

.svg)
.svg)
.svg)
.svg)
.svg)
.svg)
.svg)
Adding and Removing Users
Incorporating new users with varying degrees of authority can assist in streamlining your operations and enhance the management of your enterprise. If there are multiple individuals tasked with making or receiving payments, each can have a distinctive username and password.
1) Adding New Users:
In your account, click on ‘settings’ at the bottom left-hand corner then select ‘Manage Users’. On the right-hand side menu, your name is with your title. (Only users with the title ‘admin’ are able to manage users of the company.)
Click the button ‘invite user’.

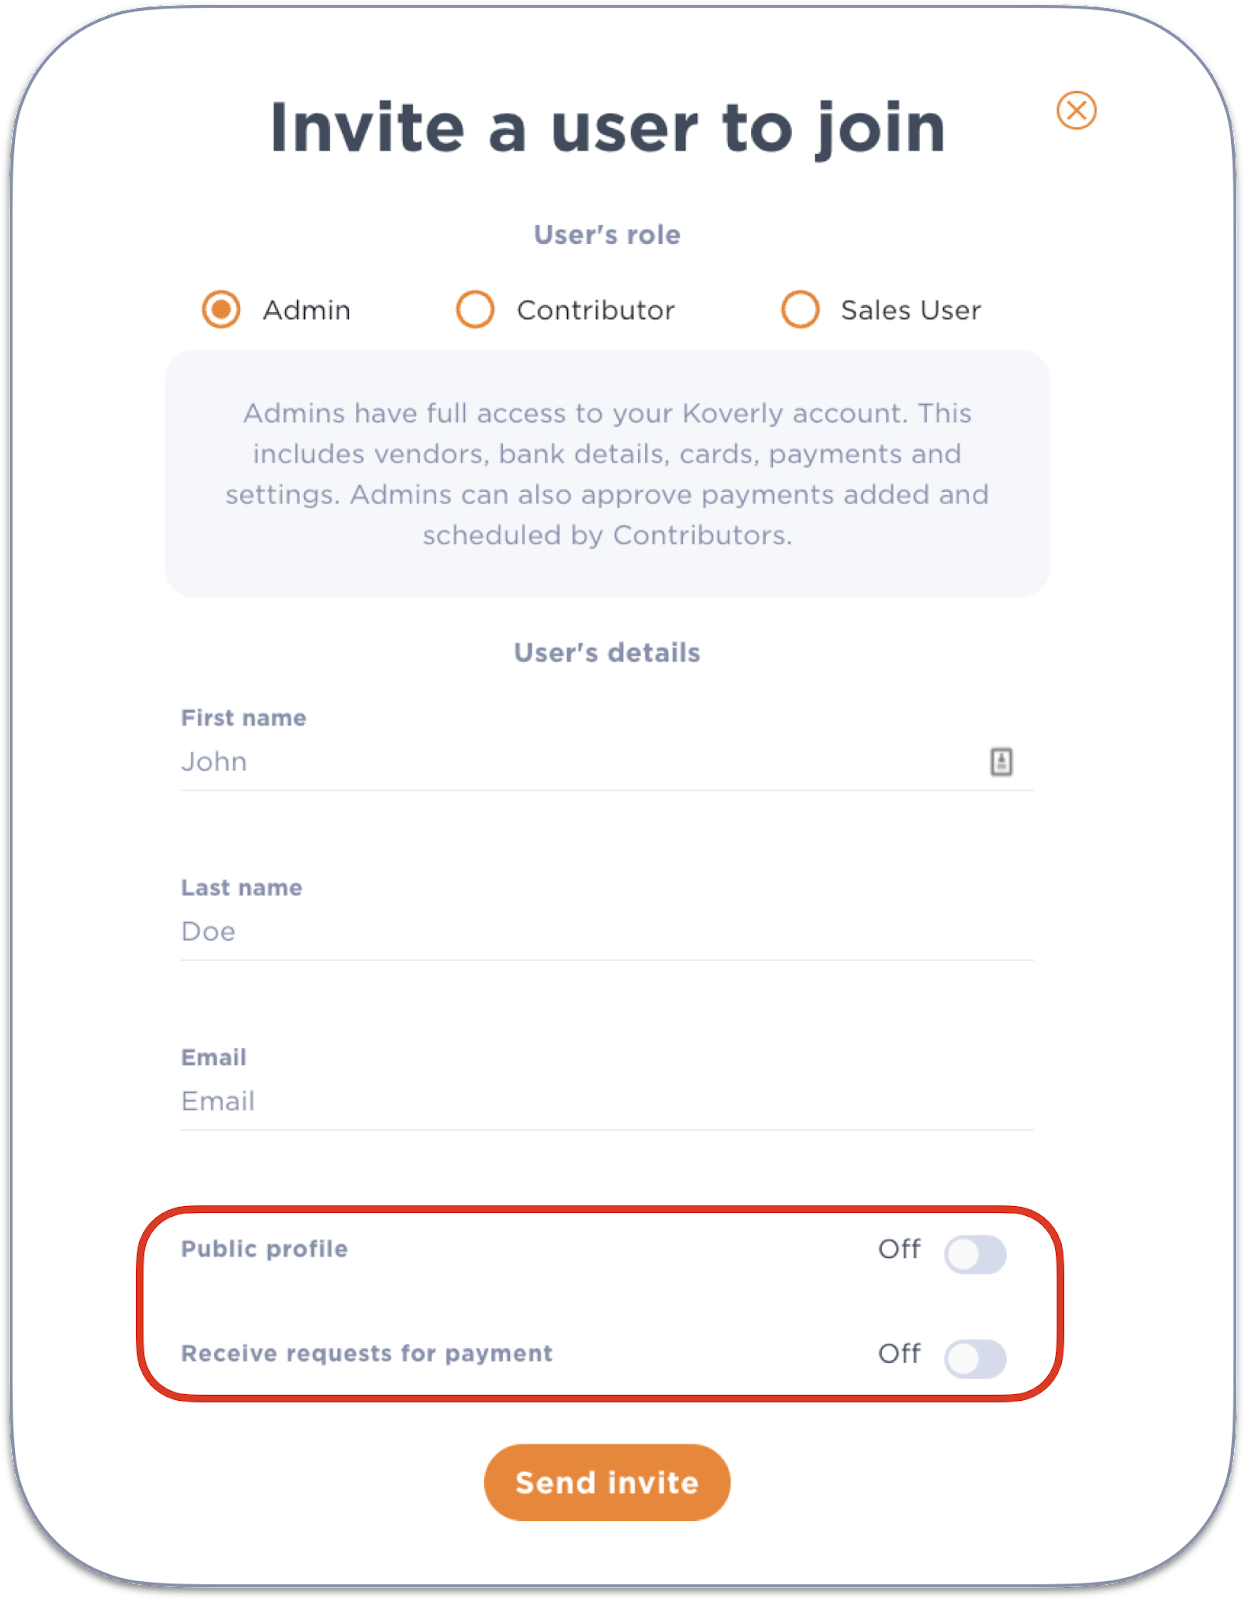
2) Choose the User’s Role:
You can choose between three levels of control. After you choose one of the three options, enter the user's name and email address.
- Sales user - has limited access to your Koverly account. This is an access level that you can give to your sales representatives.

- Admin - Admins have full access to your Koverly account. This includes vendors, bank details, cards, payments, and settings. Admins can also approve payments added and scheduled by Contributors.
- Contributor - Use this role for team members that require limited permissions. Contributors can add or modify any payments. Admin can grant contributor ability to pay bills up to an allotted amount set by the admin (this feature is optional).
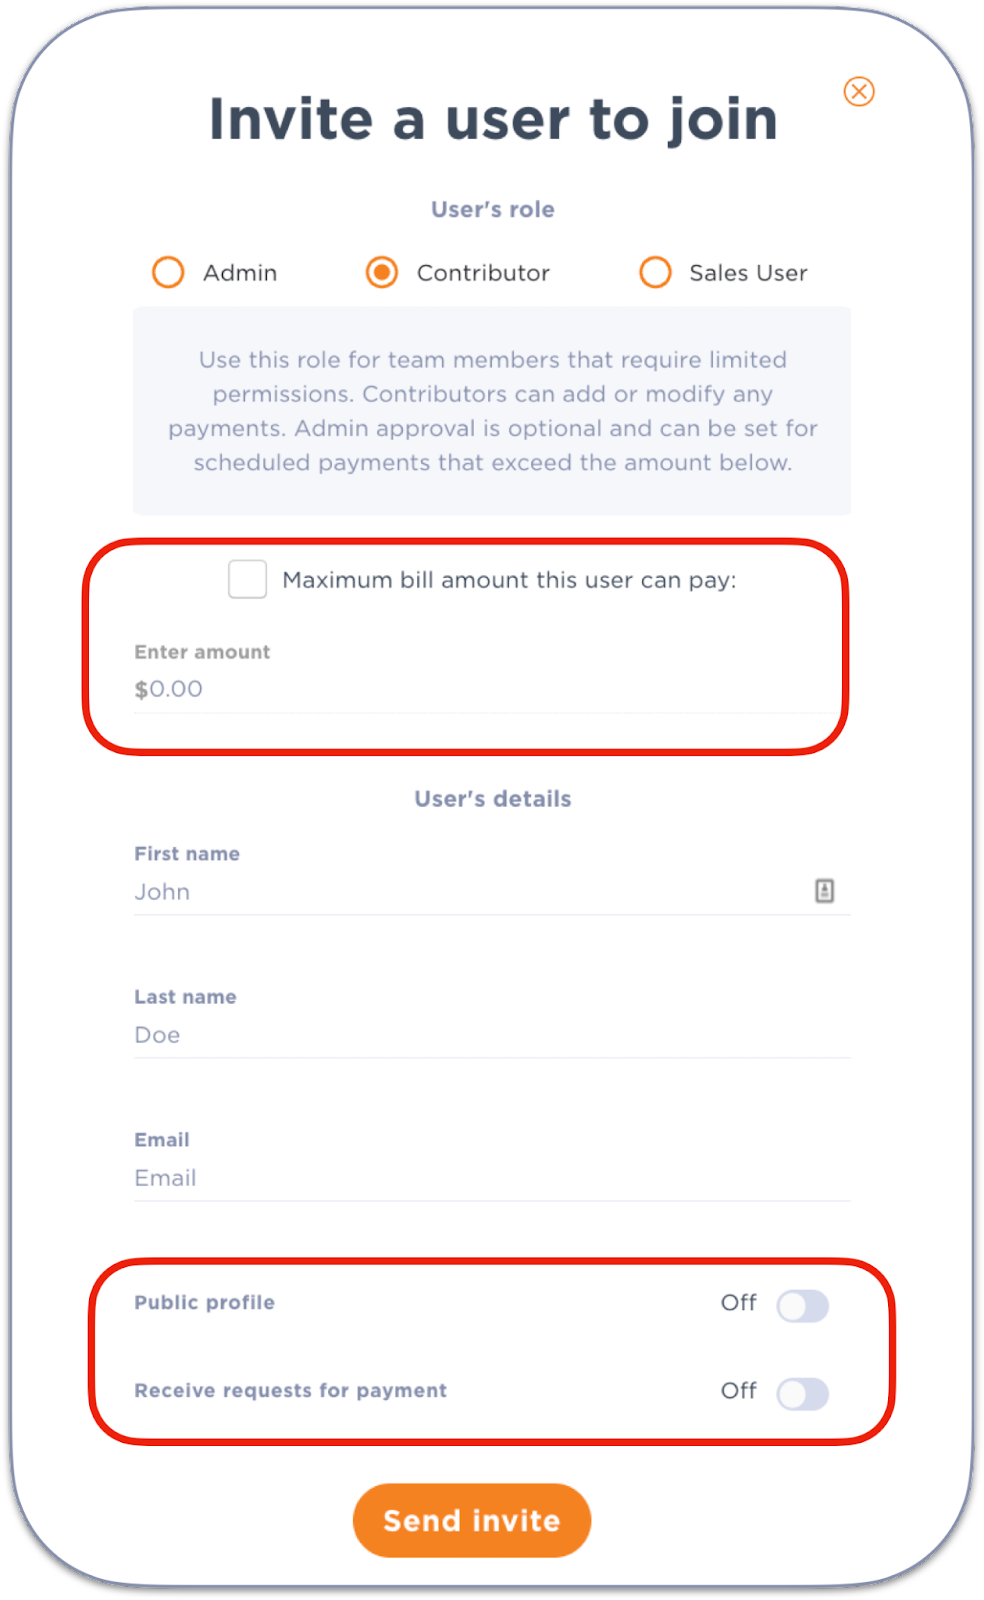
If you are inviting an Admin or a Contributor, you will see two additional settings:
- Public profile - only one person in your company can be considered a "public profile". This should be the main point of contact in your company. Vendors and Customers, who use Koverly, will see this information as a "main contact" in your company's details.
- Receive requests for payments - this setting can be "on" for any user who is responsible for making payments. If your Vendors use Koverly, they will be able to send you requests for payments when you have new bills to pay.
Once you make sure all the information is correct, you can hit the "send invite" button. The invited person should receive an email from Koverly to join your company's profile.
NOTE: If you have more than one company, even though they are under the same Koverly login, they are treated as separate companies. Therefore, if you want someone to have access to all of your businesses, you need to invite them to all of them separately.
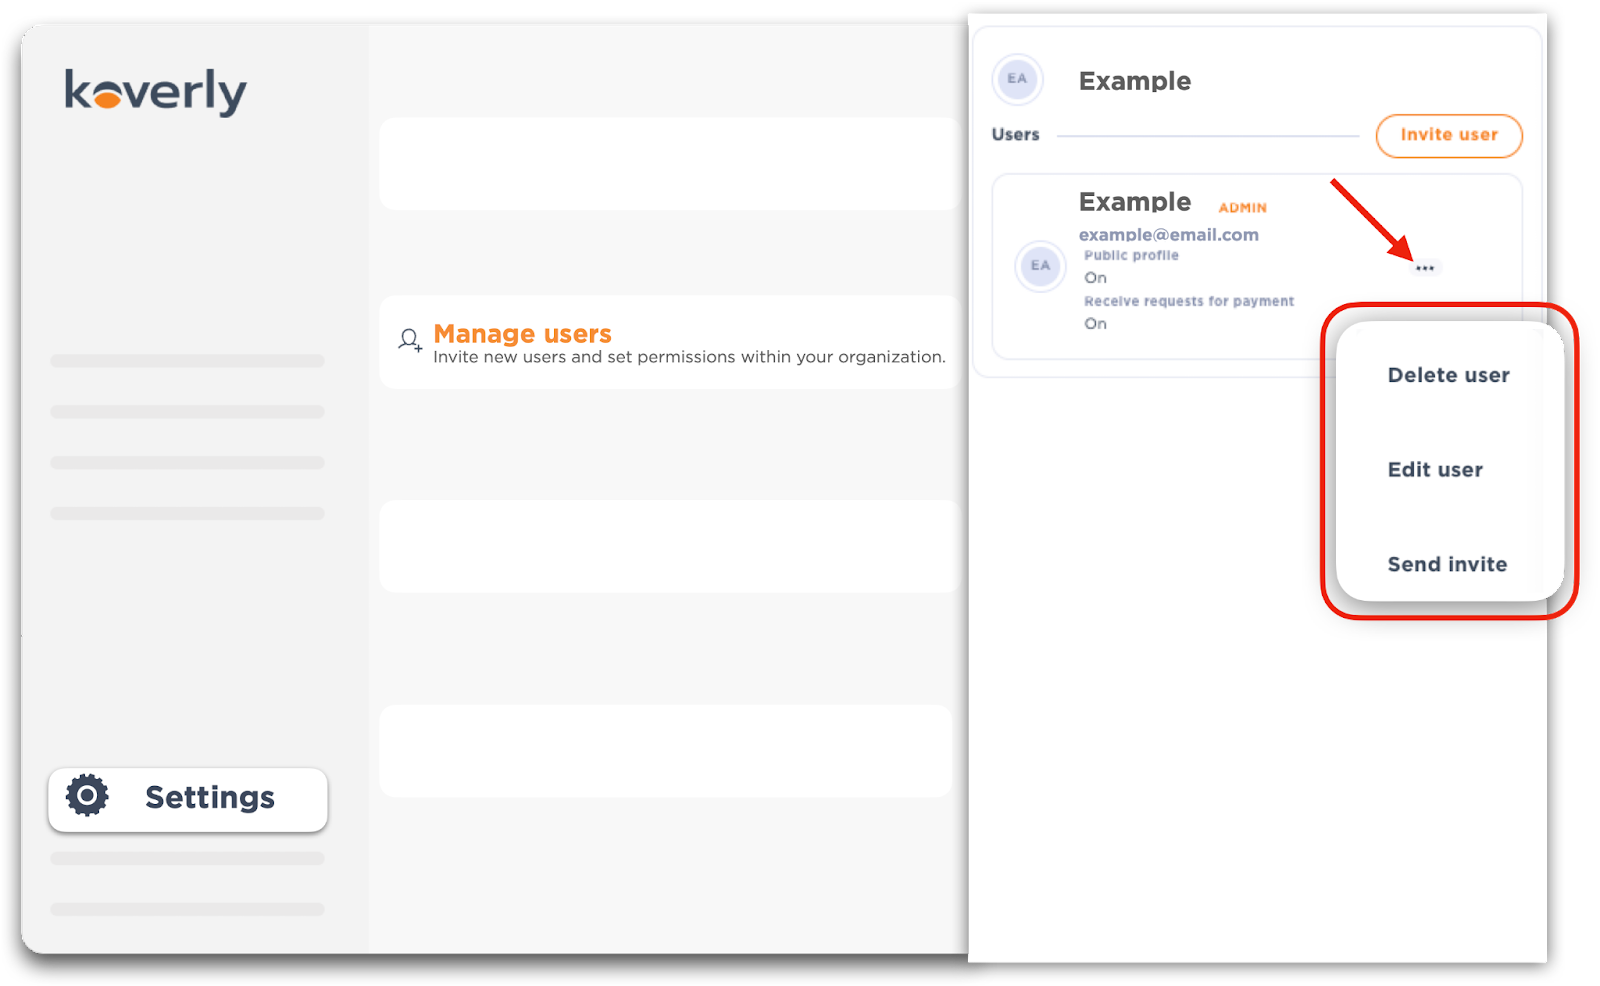
3) Editing Existing Users:
Once you add more users, you may need to edit or delete them. You can also resend the invite if needed. To be able to do that you have to click on three dots next to the user name.
.png)
with Koverly
.svg)
